






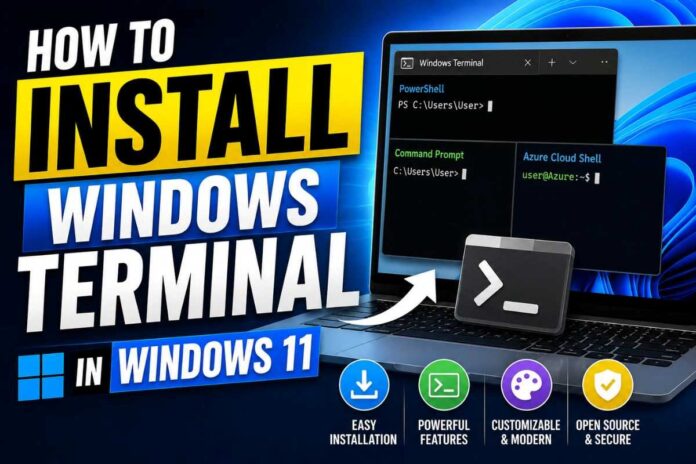


Windows Terminal has become one of the most useful tools for developers, IT professionals, and power users working on Windows 11. It combines Command Prompt, PowerShell, Windows Subsystem for Linux (WSL), and Azure Cloud Shell into a single, modern, tabbed interface. Instead of juggling multiple console windows, you get one unified app with customizable themes, split panes, GPU-accelerated text rendering, and full Unicode and emoji support.
The good news is that most Windows 11 installations already include Windows Terminal by default. However, some users — especially those running older builds, Windows 11 LTSC, or custom/enterprise images — may find it missing or outdated. If you’re one of them, don’t worry. This guide walks you through every method to install, update, and set Windows Terminal as your default terminal application on Windows 11, along with troubleshooting tips and frequently asked questions.
Whether you prefer using the Microsoft Store, PowerShell commands, GitHub downloads, or the Windows Package Manager (winget), this article covers it all in simple, step-by-step instructions suitable for beginners and advanced users alike.
What Is Windows Terminal?
Windows Terminal is a free, open-source, modern terminal application developed by Microsoft. It replaces the legacy Command Prompt and PowerShell console windows with a single application that supports:
- Multiple tabs and panes (split-screen terminals)
- Custom themes, color schemes, and background images
- GPU-accelerated text rendering using DirectWrite and DirectX
- Full support for Unicode, emojis, and ligatures
- Integration with WSL (Windows Subsystem for Linux), PowerShell, Command Prompt, and Azure Cloud Shell
- JSON-based configuration for deep customization
Because it’s actively developed and open-source, Windows Terminal receives frequent updates with new features and performance improvements — making it far superior to the classic console host.
Before You Begin: System Requirements
Before installing Windows Terminal, make sure your system meets these basic requirements:
- Operating System: Windows 11 (any edition) or Windows 10 version 1903 (build 18362) or later
- Architecture: x64, x86, or ARM64
- Internet Connection: Required for downloading via Microsoft Store, winget, or GitHub
- Microsoft Account: Optional, but recommended for Microsoft Store installation
Now let’s look at the different methods you can use to install Windows Terminal on Windows 11.
Method 1: Install Windows Terminal via Microsoft Store (Recommended)
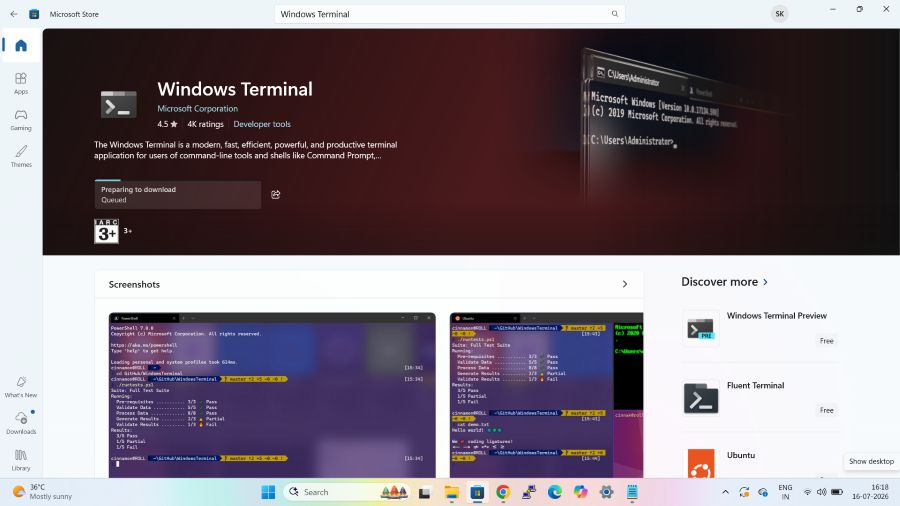
The easiest and most reliable way to install Windows Terminal is through the Microsoft Store. This method ensures you always receive automatic updates.
Steps:
- Press the Start button or hit the Windows key on your keyboard.
- Type “Microsoft Store” and open the app.
- In the search bar at the top, type “Windows Terminal”.
- Click on the official Windows Terminal app published by Microsoft Corporation.
- Click the Get or Install button.
- Wait for the download and installation process to complete (usually takes less than a minute).
- Once installed, click Open, or search for “Terminal” in the Start menu to launch it.
Why Use This Method?
- Automatic background updates
- Verified, safe source
- No manual configuration needed
- Works seamlessly with Windows Update
This is the best method for most home users and professionals who want a hassle-free installation experience.
Method 2: Install Windows Terminal Using Winget (Windows Package Manager)
If you prefer using the command line or need to automate installations across multiple machines, winget is an excellent choice. Winget comes pre-installed on most Windows 11 systems.
Steps:
- Open PowerShell or Command Prompt as Administrator:
- Right-click the Start button and select Windows Terminal (Admin) or PowerShell (Admin).
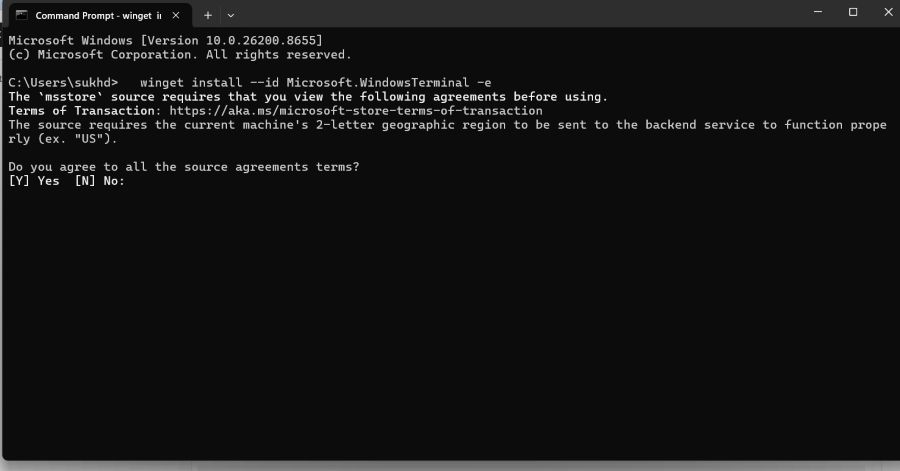
- Type the following command and press Enter:
winget install --id Microsoft.WindowsTerminal -e- If prompted, accept the source agreement by typing Y and pressing Enter.
- Winget will automatically download and install the latest version of Windows Terminal.
- Once completed, you’ll see a confirmation message in the console.
Bonus Tip:
To check if Windows Terminal is already installed via winget, run:
winget list Microsoft.WindowsTerminalTo update it later, simply run:
winget upgrade Microsoft.WindowsTerminalThis method is ideal for IT administrators managing multiple systems or users comfortable with scripting and automation.
Method 3: Install Windows Terminal via GitHub (Manual Installation)
If you don’t have access to the Microsoft Store (common in some enterprise or education environments), you can manually download and install Windows Terminal from its official GitHub repository.
Steps:
- Open your web browser and navigate to the official Windows Terminal GitHub releases page.
- Scroll down to the Assets section of the latest release.
- Download the file that matches your system architecture:
.msixbundlefile for most users (works across x64, x86, and ARM64)
- Once downloaded, double-click the
.msixbundlefile. - Windows will open the App Installer window. Click Install.
- Wait for the installation to finish, then launch Windows Terminal from the Start menu.
Important Note:
If you receive a certificate or “app package” error during installation, you may need to enable Developer Mode or sideloading apps in Windows Settings:
- Go to Settings > Privacy & Security > For Developers.
- Enable Developer Mode or Install apps from any source, including loose files.
This method is useful for offline installations or environments where Microsoft Store access is restricted.
Method 4: Install Windows Terminal Using PowerShell and MSIX
For advanced users who want more control, you can also install Windows Terminal directly using PowerShell’s Add-AppxPackage cmdlet after downloading the MSIX bundle.
Steps:
- Download the latest
.msixbundlefile from the official GitHub releases page (as described in Method 3). - Open PowerShell as Administrator.
- Navigate to the folder where the file was downloaded, for example:
cd $env:USERPROFILE\Downloads- Run the following command, replacing the filename with your downloaded file:
Add-AppxPackage -Path ".\Microsoft.WindowsTerminal_x.xx.xxxx.0_8wekyb3d8bbwe.msixbundle"- Press Enter and wait for the installation to complete.
This method is particularly useful for scripted deployments, virtual machines, or systems where GUI-based installation isn’t convenient.
Method 5: Install via Chocolatey (For Chocolatey Users)
If you already use Chocolatey, a popular third-party package manager for Windows, you can install Windows Terminal with a single command.
Steps:
- Open PowerShell or Command Prompt as Administrator.
- Run the following command:
choco install microsoft-windows-terminal- Confirm the installation when prompted by typing Y.
- Once completed, launch Windows Terminal from the Start menu.
This method is great for developers who manage software installations through Chocolatey scripts and configuration files.
How to Set Windows Terminal as Your Default Terminal App
After installation, you may want to set Windows Terminal as the default app whenever you open Command Prompt, PowerShell, or WSL.
Steps:
- Open Windows Terminal.
- Click the dropdown arrow next to the “+” tab icon, then select Settings (or press
Ctrl + ,). - In the Settings window, go to the Startup section.
- Under Default Terminal Application, select Windows Terminal.
- Close and reopen any console-based application to see the change take effect.
Alternatively, you can set this from Windows Settings:
- Go to Settings > Privacy & Security > For Developers.
- Scroll to Terminal and set Windows Terminal as the default.
How to Update Windows Terminal
Keeping Windows Terminal updated ensures you get the latest features, security patches, and bug fixes.
- Microsoft Store users: Updates happen automatically, or you can manually check via Microsoft Store > Library > Get Updates.
- Winget users: Run
winget upgrade Microsoft.WindowsTerminalin an elevated terminal. - Manual (GitHub) users: Download the latest
.msixbundlefile and reinstall it — it will automatically update the existing version.
Troubleshooting Common Installation Issues
Even with a straightforward installation process, you might occasionally run into problems. Here are quick fixes for the most common ones:
Issue: “This app package is not supported” error Solution: Ensure your Windows 11 build is up to date via Windows Update, and confirm you downloaded the correct architecture (x64, x86, or ARM64).
Issue: Windows Terminal not appearing in Start menu after installation Solution: Restart your computer, or search directly using the Windows search bar. If it still doesn’t appear, try reinstalling via winget.
Issue: Microsoft Store won’t open or install apps Solution: Reset the Microsoft Store cache by running wsreset.exe from the Run dialog (Windows key + R).
Issue: Winget command not recognized Solution: Install or update App Installer from the Microsoft Store, which includes winget.
Conclusion
Windows Terminal is an essential upgrade for anyone who regularly works with Command Prompt, PowerShell, or WSL on Windows 11. Its modern interface, tabbed navigation, and deep customization options make it far more efficient than the legacy console windows most users are accustomed to.
Whether you choose the simplicity of the Microsoft Store, the speed of winget, the flexibility of manual GitHub installation, or automation-friendly options like PowerShell and Chocolatey, installing Windows Terminal takes just a few minutes. Once installed, setting it as your default terminal ensures a consistent, modern command-line experience across your entire system.
If you haven’t already made the switch, now is a great time to install Windows Terminal and experience a faster, more customizable way to work with the command line on Windows 11.
Frequently Asked Questions (FAQs)
1. Is Windows Terminal free to use? Yes, Windows Terminal is completely free and open-source. It’s developed by Microsoft and available on GitHub under an open-source license, with no hidden costs or subscriptions.
2. Does Windows 11 come with Windows Terminal pre-installed? In most cases, yes. Newer versions of Windows 11 include Windows Terminal by default. However, certain editions like Windows 11 LTSC or custom enterprise images may not include it, requiring manual installation.
3. Can I use Windows Terminal to run Linux commands? Yes. If you have Windows Subsystem for Linux (WSL) installed, Windows Terminal will automatically detect it and let you open Linux distributions like Ubuntu or Debian directly within a new tab.
4. What is the difference between Windows Terminal and Command Prompt? Command Prompt is a legacy console application with limited customization, while Windows Terminal is a modern app that supports tabs, panes, GPU-accelerated rendering, themes, and multiple shell integrations (PowerShell, CMD, WSL, and Azure Cloud Shell) all in one window.
5. How do I uninstall Windows Terminal if needed? Go to Settings > Apps > Installed Apps, search for “Windows Terminal,” click the three-dot menu next to it, and select Uninstall. Alternatively, use the command winget uninstall Microsoft.WindowsTerminal in an elevated terminal.