






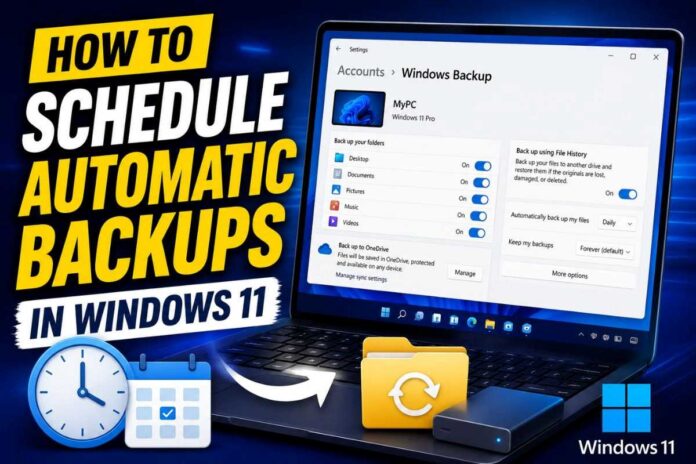


Losing years of photos, documents, or a finely tuned system setup to a hard drive crash, ransomware attack, or accidental deletion is one of the most frustrating experiences a computer user can have — and it’s almost always preventable. Windows 11 comes with several built-in tools that let you schedule automatic backups so your files and system stay protected without you having to remember to do anything manually.
In this guide, you’ll learn how to schedule automatic backups in Windows 11 using File History, OneDrive, the legacy Backup and Restore (system image) tool, and Task Scheduler with Robocopy for advanced automation. Whether you want to protect a folder of family photos or create a full system image you can restore from in a disaster, this tutorial walks you through every method step by step.
Why You Need Automatic Backups in Windows 11
Manual backups rely on human memory, and human memory is unreliable. An automatic, scheduled backup runs quietly in the background, capturing new and changed files at set intervals so that even if disaster strikes today, you’re only ever a few hours (or minutes) away from your most recent version. Automatic backups also help you:
- Recover quickly from ransomware, malware, or accidental file deletion
- Avoid data loss from hardware failure, power surges, or a failing drive
- Keep multiple versions of a file so you can roll back to an earlier draft
- Protect your entire system, not just your personal files, so a full reinstall isn’t your only option after a crash
With that context in mind, let’s go through each method available in Windows 11.
Method 1: Schedule Automatic Backups with File History
File History is Microsoft’s built-in tool for continuously backing up your personal folders (Documents, Pictures, Desktop, Music, Videos, and more) to an external drive or network location. It runs silently in the background on a schedule you control, and it keeps multiple versions of each file so you can restore an earlier copy if needed.
Step-by-step tutorial:
- Connect an external hard drive or USB drive to your PC (or set up a network location).
- Open the Start menu, type File History, and click Open.
- Windows will usually detect your connected drive automatically as the backup destination. If not, click Select a drive and choose it manually.
- Click Turn on to activate File History.
- To exclude folders you don’t want backed up, click Exclude folders and add them to the list.
- Click Advanced settings to fine-tune your schedule:
- Save copies of files: choose how often backups run — options range from every 10 minutes to daily (hourly is the default).
- Keep saved versions: decide how long old versions are retained, from one month to forever.
- Click Save changes.
From this point on, File History will automatically back up your selected folders at the interval you chose, as long as your backup drive is connected.
Tip: If you’re using the newer Settings-based path, go to Settings > System > Storage > Advanced storage settings > Backup options, then select Add a drive under “Back up using File History” to achieve the same result through a more modern interface.
Method 2: Automatically Back Up Files with OneDrive
If you’d rather not depend on an external drive, OneDrive gives you continuous cloud backup that syncs the moment a file changes — no manual scheduling required, since it works in near real time whenever you’re signed in and connected to the internet.
Step-by-step tutorial:
- Click the OneDrive cloud icon in the system tray (or search for OneDrive in the Start menu and sign in with your Microsoft account).
- Click the OneDrive icon, then select Help & Settings > Settings.
- Go to the Backup tab and click Manage backup.
- Select the folders you want backed up automatically — typically Desktop, Documents, and Pictures — then click Save changes.
- OneDrive will begin uploading your files immediately and will continue to sync any new or changed files automatically going forward.
Because OneDrive backups are cloud-based, they’re accessible from any device you sign into, and they protect you even if your entire computer is lost, stolen, or destroyed — something local-only backups can’t do on their own.
Best practice: Combine File History (local) with OneDrive (cloud) for a dual-layer backup strategy. If one fails, you still have the other.
Method 3: Schedule a Full System Backup with Backup and Restore (Windows 7)
For a complete system image — including your OS, installed programs, settings, and personal files — Windows 11 still includes the legacy Backup and Restore (Windows 7) tool. This is the option to use if you want to be able to restore your entire PC to an exact previous state after a major failure, rather than just recovering individual files.
Step-by-step tutorial:
- Open the Start menu, type Control Panel, and open it.
- Go to System and Security > Backup and Restore (Windows 7).
- Click Set up backup in the left-hand panel.
- Choose where to save your backup — an external drive is recommended — and click Next.
- Choose Let Windows choose (recommended for most users) or Let me choose if you want to select specific folders and whether to include a system image.
- Click Next, review your backup settings, then click Change schedule to set how often the backup runs (daily, weekly, or monthly) and at what time.
- Click OK, then Save settings and run backup.
Windows will now automatically create a full backup on the schedule you defined, giving you a reliable fallback for full system recovery.
Note: This tool is inherited from Windows 7 and hasn’t been significantly updated, so for very granular scheduling or advanced automation rules, many users pair it with third-party software or Task Scheduler (covered next).
Method 4: Advanced Automation with Task Scheduler and Robocopy
For users who want full control over exactly what gets backed up, where it goes, and when, Windows 11’s built-in Task Scheduler combined with the Robocopy command-line tool offers a powerful, script-driven alternative that costs nothing and requires no third-party software.
Step-by-step tutorial:
- Open Notepad and create a simple backup script, for example:
robocopy "C:\Users\YourName\Documents" "D:\Backups\Documents" /MIR /R:3 /W:5This mirrors your Documents folder to a backup drive, retrying failed copies up to 3 times with a 5-second wait. 2. Save the file as backup.bat (make sure “Save as type” is set to All Files). 3. Open the Start menu, search for Task Scheduler, and open it. 4. Click Create Basic Task in the right-hand panel. 5. Give your task a name (e.g., “Daily Documents Backup”) and click Next. 6. Choose a trigger — Daily, Weekly, or When I log on — and click Next. 7. Set your preferred start time and recurrence, then click Next. 8. Choose Start a program, click Next, and browse to select your backup.bat file. 9. Click Next, review the summary, and click Finish.
From now on, your script will run automatically at the scheduled time, copying only new or changed files (thanks to Robocopy’s mirroring capability) without any manual intervention.
This method is ideal for tech-savvy users, IT professionals, or anyone who wants precise control over backup timing, source and destination paths, and file-matching rules.
Method 5: Use Third-Party Backup Software (Optional)
While Windows 11’s built-in tools cover most everyday needs, some users prefer dedicated backup software for extra features like incremental and differential backups, automatic cleanup of old backup versions, backup verification, and support for cloud destinations beyond OneDrive. Popular options include AOMEI Backupper, Macrium Reflect, and EaseUS Todo Backup. These tools typically offer a more visual scheduling interface and can automatically delete outdated backups to free up disk space — something the built-in tools don’t always handle gracefully.
If you rely heavily on your PC for work, or you’re managing backups across multiple machines, this extra layer of automation and flexibility can be worth the investment.
Best Practices for Automatic Backups in Windows 11
- Follow the 3-2-1 rule: keep at least three copies of your data, on two different types of media, with one copy stored off-site (such as in the cloud).
- Test your backups periodically by restoring a sample file to confirm the backup actually works.
- Disconnect external backup drives when not actively backing up to protect them from ransomware that could otherwise encrypt your backups too.
- Combine local and cloud backups for redundancy — File History or Robocopy locally, plus OneDrive or another cloud service for off-site protection.
- Review your schedule periodically to make sure it still matches how often your files actually change.
Frequently Asked Questions
1. Does Windows 11 have a built-in automatic backup feature? Yes. Windows 11 includes File History for continuous file backup, OneDrive for automatic cloud sync, and the legacy Backup and Restore (Windows 7) tool for full system image backups. None of these require third-party software, though they do have some limitations compared to dedicated backup applications.
2. How often should I schedule automatic backups? It depends on how frequently your files change. For actively used documents and work files, hourly or daily backups (via File History or OneDrive) are ideal. For a full system image, weekly or monthly is usually sufficient, since these are meant for disaster recovery rather than everyday version tracking.
3. Can I back up to a network drive instead of a USB drive? Yes. Both File History and Backup and Restore support network locations as a backup destination, provided the network share is accessible and has enough storage space. This is a convenient option for households or offices with a NAS (network-attached storage) device.
4. What happens if my backup drive is disconnected when a scheduled backup runs? Windows will simply skip that scheduled backup and attempt it again the next time the drive is connected. File History, in particular, will resume automatically once it detects the drive again, so you won’t lose your existing backup history — you’ll just miss the interim changes until the next successful run.
Conclusion
Scheduling automatic backups in Windows 11 doesn’t require special expertise or expensive software — it just requires choosing the right built-in tool for your needs and setting it up once. File History is perfect for continuous protection of personal files, OneDrive adds reliable cloud redundancy, Backup and Restore covers full system images for disaster recovery, and Task Scheduler with Robocopy gives advanced users granular, script-based control.
For the best protection, combine at least two of these methods so that a single point of failure never puts your data at risk. Set it up today, and you’ll never have to worry about losing important files to an unexpected crash, deletion, or attack again.